simple way to manage files that exist on a bunch of different workstations and personal devices. The work folder will act as a host and synchronize the users’ files to this location so they can access their file from inside or outside the network. This differs from File Server or DFS Namespaces in that these are client-hosted file. Going back to our example about Sarah and Matthew in the Human Resources department, Matthew and Sarah could be using Work Folders so that files saved in specific locations on their workstations would be synchronized with a files server and updated. If they are working on a project together but from different locations, those files are always available and synchronized.
- More and more our staff want to use their own gadget such as smart phones and tablets to access corporate data files while out of the office.
- Work Folders use a new synchronization protocol to synchronize corporate data to user devices from a centralized, on-premises server.
- Work Folders is a new role service of the File and Storage Services role and is available only in Windows Server 2012 R2 and 2016
- When a user creates or modifies a file in a Work Folders folder on any device or PC, it is replicated automatically to the corporate file server’s sync share via Secure Sockets Layer (SSL) connections on port 443.
Now lets go through a Step by Step How to Install and Configure Work Folder in Windows Server 2016 and Windows 10.
Infrastructure Requirement :
- 1 DC SERVER (DC-CLOUD)
- 1 Client PC running Windows 10 (CLIENT-10)
1 – open your Server Manager and click on Add Roles and Features.
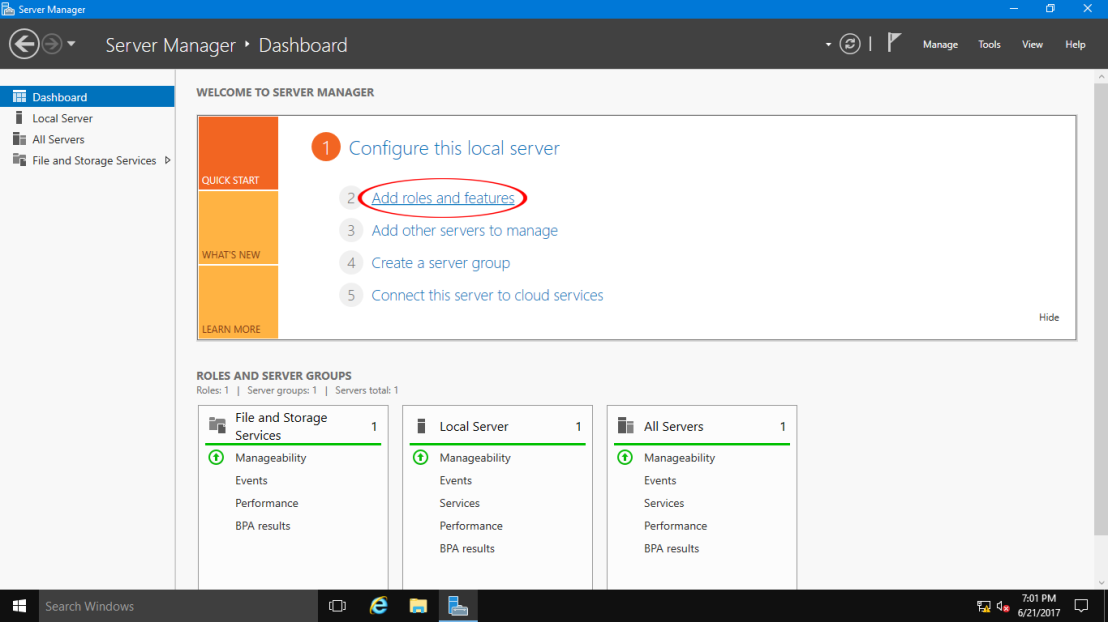
2 – click on Next.

3 – Now select Role-based or feature-based installation option and click on Next.

4 – Now select desired server you’d like to install Work Folder on.

5 – On the Select server roles interface, under File an Storage Services, click Work Folders and Click Add features then click Next.


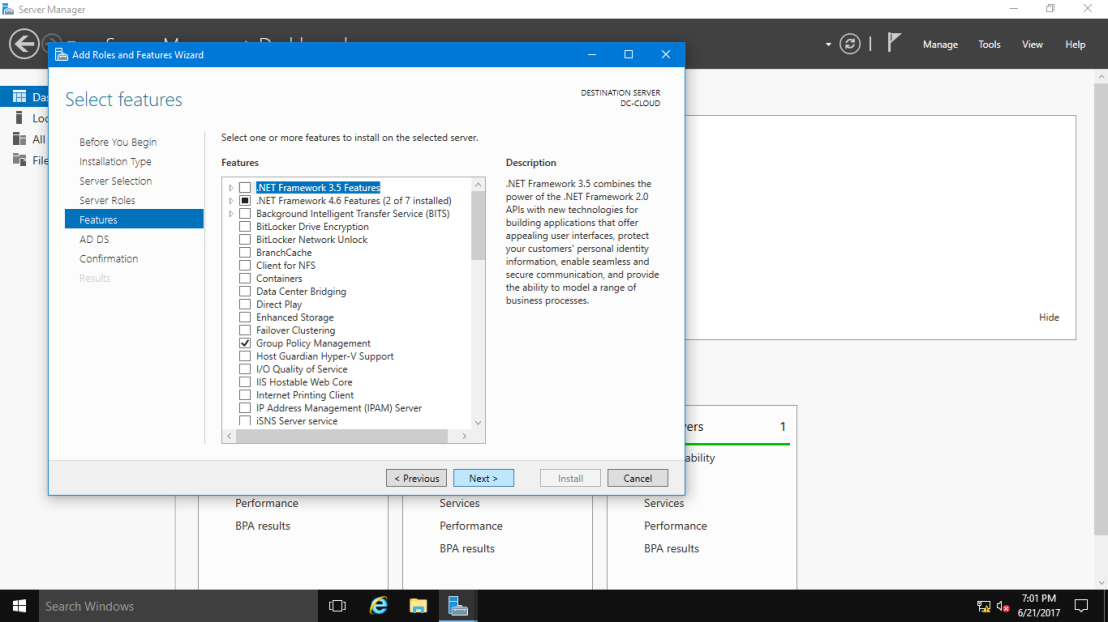
6 – On the Select features interface, click Next to proceed.
7 – On the Confirmation installation selections interface, click Install.

8 – Wait for few second until installation successful, then click Close.


9 – Open Server Manager, on the right side click File and Storage Services.

10 – Click Work Folders, and then click “To create a sync share for Work Folders, start the New Sync Share Wizard”.

11 – On the Before you begin interface, click Next.

12 – On the Select the server and path interface, under Server verify that you have your server which is in my case, DC-CLOUD with Online status.
under location, click Enter a local Path : and the type C:\WORK Folder Users (this will be our new empty Work Folder that will share with Domain Users), and then click Next.

13 – On the Specify the structure for user folders, click User alias and then click Next.

11 – On the Enter the sync share name interface, just click Next.

12 – On the Grant sync access to group interface, click Add and then in the Enter the object name to select, type Domain Users and then click OK and click Next to proceed.(for this Demo, i allow all my domain users to have Work Folder function to sync to my DC-CLOUD server.


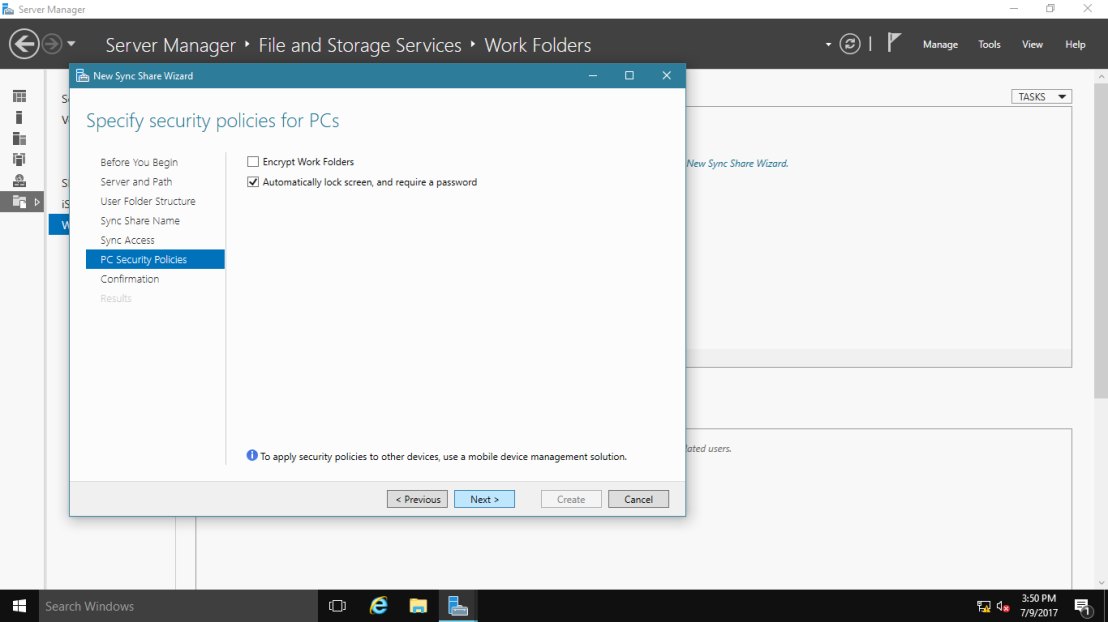
13 – On the Specify device policies interface, click Next
14 – On the Confirm selections interface, click Create.

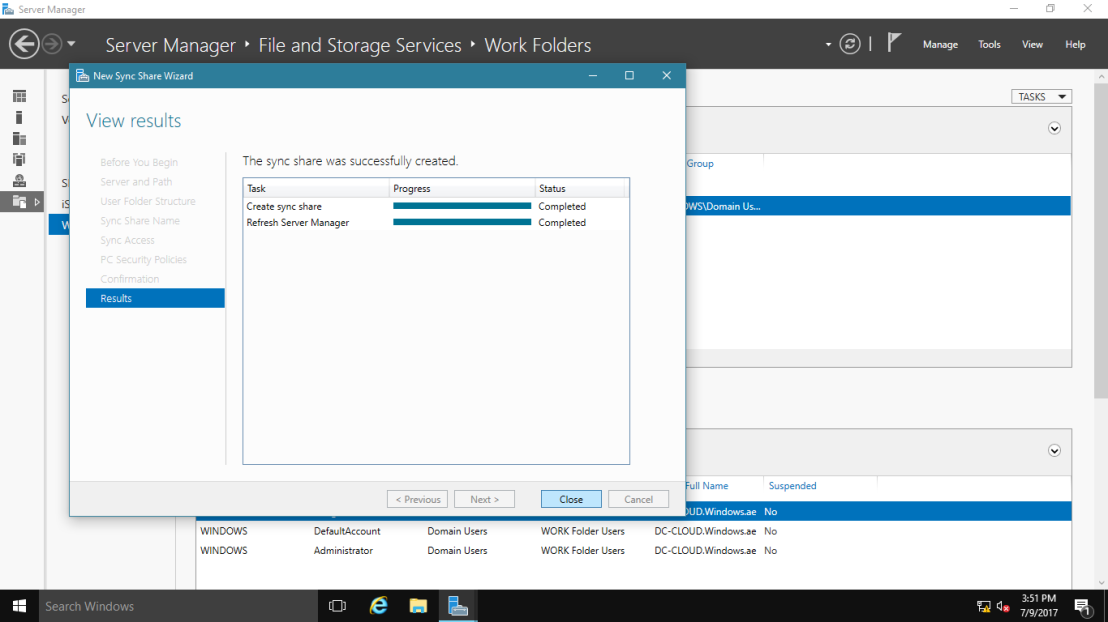
15 – On the View results, verify the sync share created successfully and then click Close.
16 – On the DC-CLOUD server, open Server Manager, click Tools and then click Group Policy Management.

17 – In the Group Policy Management Console interface, go to Forest:Windows.ae\Domains\Windows.ae, and Right-click the Default Domain Policy GPO, and then click Edit.

18 – In the Group Policy Management Editor interface, go to User Configuration\Policies\Administrative Templates\Windows Components\Work Folders, then double click Work Folders.

19 – In the details pane, double-click Specify Work Folders settings.

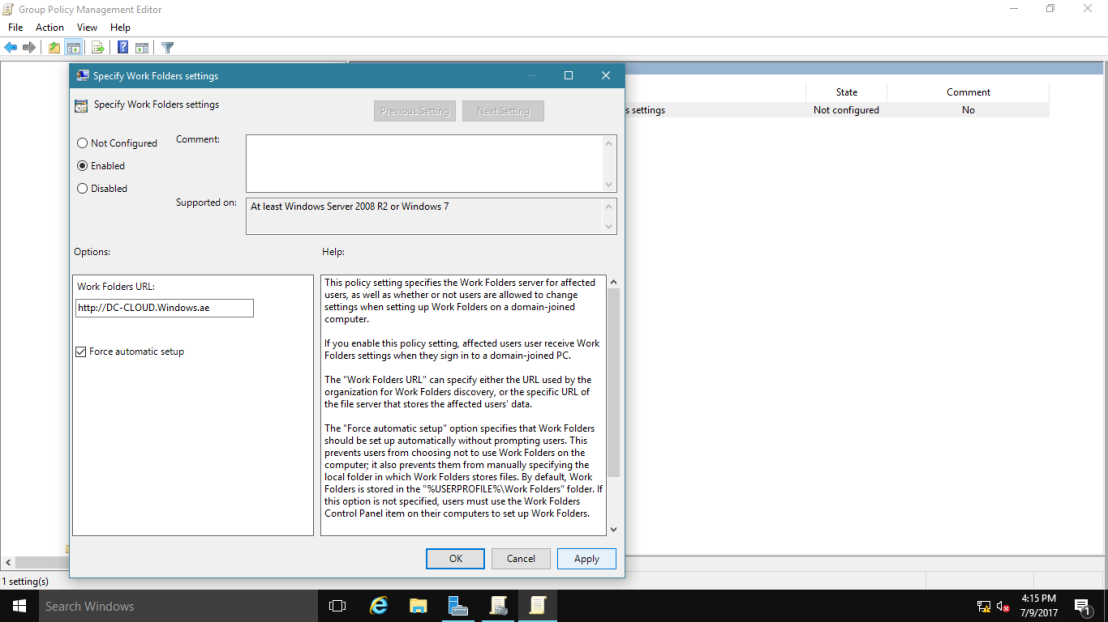
20 – On the Specify Work Folders settings interface, click Enabled, and then in Work Folders URL, type http://DC-CLOUD.Windows.ae, click Force automatic setup, and then click OK.
21 – Close all open windows, open command prompt and then type gpupdate /force.

22 – now lets log in to client PC so that we can try Work Folder function, on the Windows-CLIENT-10 PC, i log in as Sifad.

23 – for the purpose of lab testing, i will allow my Windows 10 running on unsecure connection before we start testing our Work Folders function,
open CMD and type :
Reg add HKLM\SOFTWARE\Microsoft\Windows\CurrentVersion\WorkFolders /v AllowUnsecureConnection /t REG_DWORD /d 1
By default, client always connect to the server using SSL, which requires the server to have SSL certificate installed and configured.

24 – in the Windows 10 PC, open Control Panel, and verify you have Work Folders. Then click on Work Folders.

25 – Click on Setup Work Folders.

26 – Click the Enter a Work Folder URL instead. and type Work Folder URL: http://Dc-CLOUD.Windows.ae.


27 – Select the location where you want the Work Folder to be located, click next.

28 – Your now be selected to accept the policies we setup when creating the work folder. Click I accept then click next.

29 – Just Click Close.

30 – now open Work Folders,

31 – open This PC explorer and then Quick access tab open Work Folders.

32 – to simulate the Work Folders sync function, create a folders Name : sifad Doc. and Right-Click then Click Sync now.


33 – next, switch to DC-CLOUD server, open C: drive and browse to WORK Folder Users, you will notice that synchronization is successful.

A Significant Enhancement
The Work Folders functionality in Server 2016 represents a significant enhancement over current technologies for data synchronization and accessibility. It provides the benefits of cloud-based solutions but still gives administrators the ability to control the technology’s settings and manage users’ data. Work Folders can be very useful for mobile users, especially in a BYOD environment. If Microsoft opens this technology to other platforms as promised, Work Folders will greatly help users always keep their data with them.
that’s all for now.., any Doubts type a commend.. 🙂

What is the “state” of the Server when this process begins. Have ANY features been added/installed (remote access, etc) other than the basic setup?
Does it work the same whether running Server 2016 Essentials or Standard?
LikeLike
Thank you for asking your question!
I’m running windows server 2016 Data center. If you have any error message send to me with screenshots.
Datacenter,
https://docs.microsoft.com/en-us/windows-server/storage/work-folders/work-folders-overview
LikeLike
What are the steps for configuring Work Folders to host users’ existing Home folders (using the path that is defined within each user’s respective Active Directory domain account Profile tab)?
LikeLike
Configuring Work Folders to host users’ existing Home folders using the path defined within each user’s Active Directory domain account Profile tab involves several steps. Here’s a concise guide:
1. Prepare File Server: Set up file server with ample storage and permissions.
2. Enable Work Folders Role: Enable Work Folders role on the server.
3. Configure Work Folders: Specify storage location and set up sync share.
4. Map Home Folder Paths: Define user home folder paths in Active Directory Profile tab.
5. Verify Permissions: Ensure correct NTFS and share permissions on user folders.
6. Deploy Work Folders Client: Instruct users to install and configure Work Folders client.
7. Test Connectivity: Users should test syncing their home folders with Work Folders.
8. Monitor and Troubleshoot: Monitor sync process and troubleshoot any issues.
LikeLike